Trim Sheets: My Favourite Shortcut to Big, Detailed Worlds
Ask me for the one workflow that saved me the most time over 18 years of building game environments, and I won't point at a fancy plugin or a new sculpting brush. I'll say trim sheets. They're not glamorous, they rarely make a pretty portfolio thumbnail on their own, and they are quietly the backbone of half the environments you have ever walked through in a game. Here is why I reach for them on almost every project.
What a trim sheet actually is
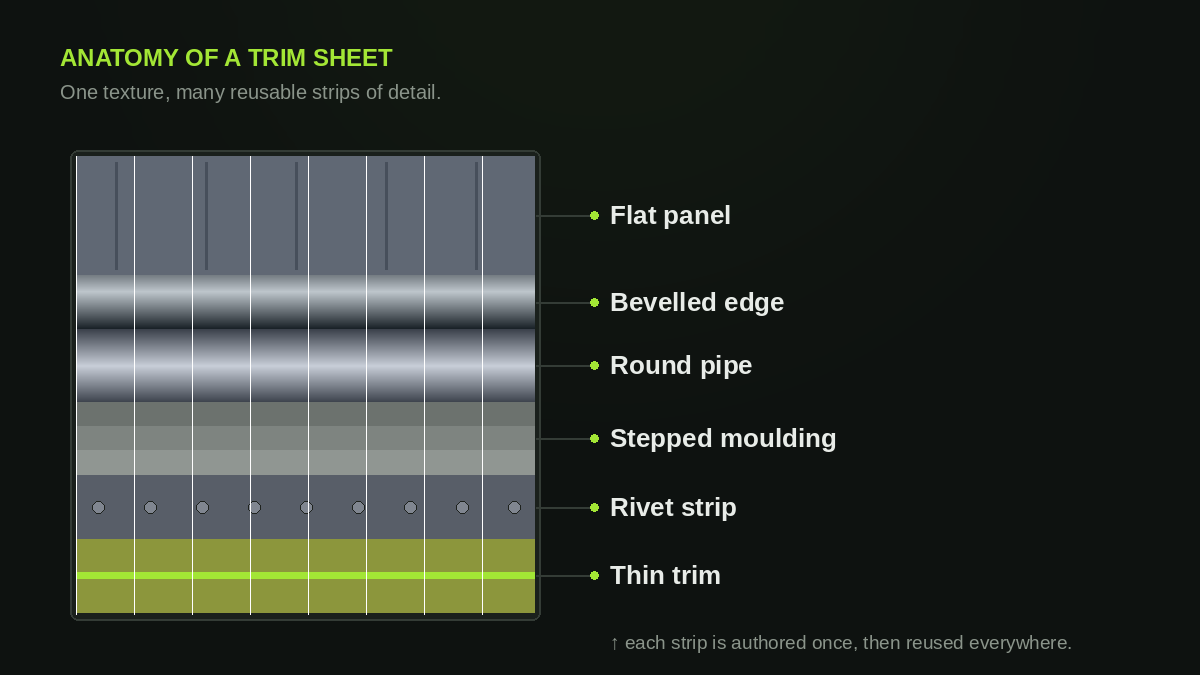
A trim sheet is a single texture where you author a set of reusable horizontal strips of detail — a metal panel, a bevelled edge, a pipe, a run of moulding, a row of rivets, a thin painted stripe. Each strip is designed to tile left to right and to be sliced vertically however you need it.
That's the whole idea. Instead of unwrapping every prop and painting a bespoke texture for it, you build one well-crafted sheet and then map your geometry onto whichever strip it needs. A door frame grabs the moulding. A support beam grabs the panel and the bevel. A crate grabs the panel and a rivet row. One texture, endless combinations.
Why they're a superpower
Three reasons I keep coming back to them:
Memory. A trim sheet is one texture — really one small set of PBR maps — serving dozens, sometimes hundreds, of meshes. On a big level that is the difference between shipping and not. Environment art lives and dies by texture-memory budgets, and trims are the cleanest way to stay under them.
Speed. Once the sheet exists, dressing a mesh is mostly UV work: slide the shell onto the right strip, tile it, done. No new bakes, no new textures, no round trip to Substance for every object. I have kit-bashed a believable corridor in an afternoon because the trims were already there.
Consistency. Because everything pulls from the same sheet, the whole environment shares a material language for free. The bevels read the same, the wear reads the same, the metal is the same metal. That cohesion is hard to fake by hand and automatic with trims.
One sheet, a whole environment
This is the part that clicks the moment you see it. The same sheet you built for a wall panel also dresses the pillar, the crate, the vent and the door — you are just re-mapping UVs onto different strips.
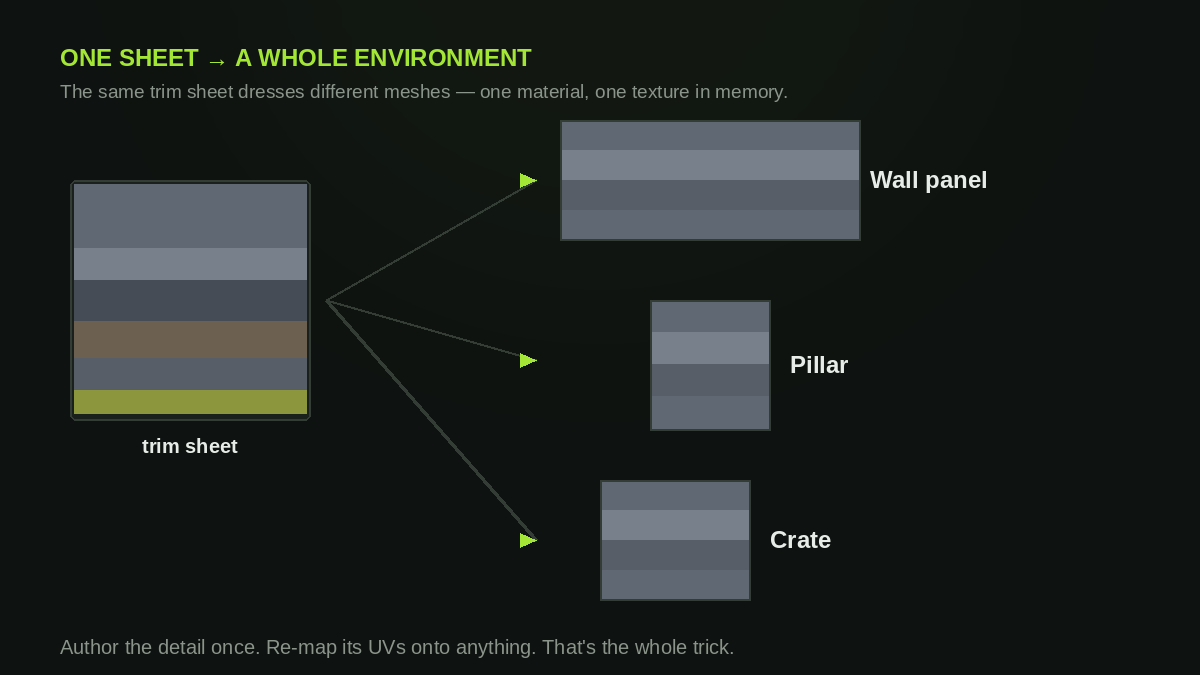
That reuse is what lets a small team fill a large level. You are not texturing a hundred objects; you are texturing one sheet really well and then spending your time on layout, lighting and composition — the things players actually feel.
How I build one
My rough process, every time:
- Plan the strips on paper first. Decide what detail the environment truly needs — usually a big panel, one or two edge treatments, a pipe, a moulding, a bolt strip, and a couple of thin accents. Don't overload it; a focused sheet beats a cluttered one.
- Block it in high-poly. I model or sculpt the strips as real geometry so the bevels and rivets bake honest normals.
- Bake it down to the flat sheet — normal, AO, curvature, the usual suspects.
- Author the PBR in Substance from those bakes: roughness variation, edge wear, a little grime.
- Test it on real meshes immediately. A sheet that looks great flat can fall apart on geometry. I map it onto a quick wall and pillar before I call it finished.
When I don't use them
Trims aren't a religion. Hero assets — the thing the camera lingers on, the boss door, the centrepiece machine — usually deserve their own unique texture. Organic surfaces like rock, cloth and foliage don't trim well either. The craft is knowing the split: trims for the 80% of the environment that is connective tissue, bespoke textures for the 20% the player stops to look at.
Master that balance and you can build worlds that feel dense and detailed on a budget that would never allow it any other way. That is the quiet magic of trim sheets, and why, after all these years, they are still the first tool I reach for.